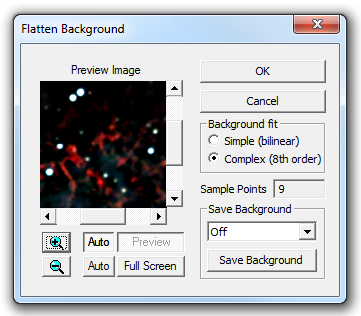
The Flatten Background command can be used when the image background level across the frame varies in a systematic way, and not due to the subject itself. Causes of these kinds of variation include a radial falloff in brightness due to instrumental vignetting, the proximity or inclusion in the image of bright stars or planets, or gradients due to sky glow, moonlight or light pollution.
Such problems can be reduced or even eliminated in many images by using this command. You specify four or more regions of the image to sample; the command then estimates the background level at those positions and fits either a plane or a higher-degree polynomial surface to the measured background at those locations. The resulting surface is subtracted from the image, thus reducing the variations. Because the command is interactive, you can preview the result and decide to add, delete, or move sample points. You can also work around any foreground objects that would bias the background extraction in the Auto Remove Gradient and Auto Flatten Background commands.
Availability of this feature depends on Product Level.

From Background Fit, pick the model you would like to use: Simple (bilinear) or Complex (8th order). Now click the mouse on different background areas in the image window. Avoid areas of nebulosity, and try not to include stars in the aperture of the mouse (innermost circle of the rings cursor). You can change the size of the aperture over which the average measurement is made by right-clicking and picking Increase Aperture, Decrease Aperture, or Set Aperture Radius in the standard image context menu. If you right-clicked on a green circle marking an existing sample region, you will recompute that one sample with the new radius as well as setting the size of subsequent samples. You cannot place a sample circle so that it intersects a previously placed sample. You can drag the green circle for a previously-placed sample area to a different location or remove it entirely by right-clicking on it and picking Discard background sample from the head of the context menu.
You must place at least four samples before background flattening can occur. With fewer samples, attempts to update the Preview Image and/or the Full Screen preview are ignored, and clicking OK displays the error message "You must select at least 4 background points". For Simple (bilinear) mode, locations near the corners of the image are recommended. In Complex (8th order) mode, you will typically need eight or more points, more or less uniformly distributed. Good results can often be obtained by operating with Auto Full Screen preview enabled, and adding new samples in the lightest and darkest areas of the interim image. For critical work, you should set the Screen Stretch to High or to Manual with the Minimum and Maximum settings close together so as to exaggerate contrast.
You can save and restore the background settings. This is useful if you need to process multiple images of the same object; for example, different filter bands. To save the current background settings click Save Background. The available modes are:
Use Previous Fit applies the exact saved profile to the current image. This will ensure that the profile is exactly the same as previously applied, regardless of target object or filter band. You cannot add extra measurement points when using a previously-saved fit.
Use Previous Points recalculates a new fit using the same measurement points as before. This will generate a different fit for each image. This is useful for example if the profile is not the same in different filter bands. Usually you cannot use this option for different target objects, as most likely the background measurement points will no longer be appropriate. If desired you can add additional points in this mode.
Setting Save Background to Off disables this feature. You will need to enter new background measurement points.