Set up the camera as described in the Basic Setup section. If your camera is currently not available, you can use the Simulator to try out the focusing features.
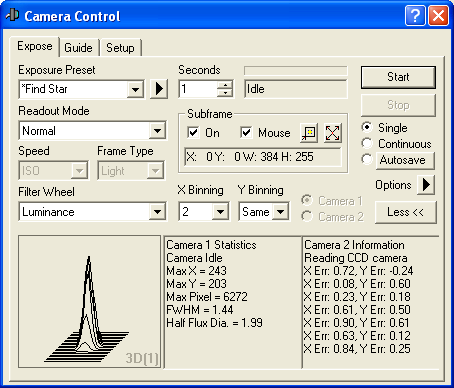
Select the Expose tab of the Camera Control window. If necessary, click the More >> button to display the Inspect Panel.

Set up dark frame subtraction. If you are using a real camera, open the Options menu and check Simple Auto-dark. If you are using the simulator, you can select No Calibration, which will speed things up slightly. If you use Simple Auto Dark and your camera does not have a shutter, you will be prompted to cover or uncover the telescope as needed.
In the Seconds field, set an exposure time of 1 second. Tip: you can use the up/down "spin" control (arrow) buttons to rapidly dial in the exposure. The range of exposure times available depends on the camera model.
Select Single exposure mode.
If your camera has Readout Mode options, select a suitable mode. Some cameras have a Normal and Fast mode; the Fast mode is lower quality but faster readout. If the camera is particularly slow to read out, you may wish to select the faster more. Be sure to use the Normal mode when imaging.
If you are using a real camera on a telescope, you should first point the telescope to a moderately bright star; say 5th magnitude.
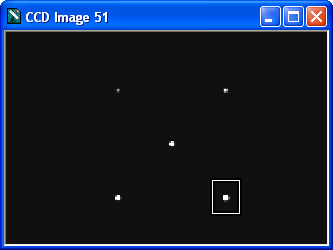
Click Start to take an exposure. After a few seconds, an image appears (simulator image shown).

Many cameras are too slow for easy full-frame focusing. It can be very difficult to focus if you have to wait a long time between updates. To speed up the process, select a subframe. In the Subframe section check On, then check Mouse. We can now select a subframe on the image using the mouse. Drag the mouse to create a box around a star (point the mouse to the top-left of the star, press and hold the left mouse button, and drag to the lower right). You will see the mouse coordinates entered automatically.
Click Start. Only the selected part of the image will be downloaded. Most CCD cameras will operate much faster if a subframe is selected.
If you wish to have the focus display update continuously, select the Continuous mode and click Start. In some cases you may wish to set a small delay between exposures. This can be done using the the Options menu and select Exposure Delay option. Click Stop to finish imaging.
The Inspect panel at bottom shows information on the star. The panels can be configured as you like them. The two text panels can be set show image statistics, including the location and value of the brightest pixel. When focus is sharp the pixel value will be maximized. To select the display mode, simply right-click on the panel.
The Full-Width Half Maximum (FWHM) of the brightest object will also be shown. This is the diameter of the star at half of the peak value. The smaller the number, the better the focus. Also shown is the Half-Flux Diameter, which is similar to FWHM but works even if the star is badly out of focus (e.g. a large donut).
The left-hand panel is for graphs. It can show a 3D representation of the star, or a graph of the peak value of the brightest star over time, the Full-Width Half Maximum (FWHM) size of the star over time, or the Half Flux Diameter (HFD) size of the star over time. Using the graph you can get an idea of focus trends as you change the focus setting on the telescope. Again, to pick the display mode, simply right-click on the panel.
Once you have adjusted focus for the best image, click Stop to interrupt the Continuous mode.