The Curves command provides you with a great deal of control over the image. You can boost the contrast in one brightness range by making the curve steeper, while reducing contrast elsewhere by flattening it out.
Many astronomical images have a few extremely bright regions (e.g. bright stars, cores of galaxies), some mid-range features, interesting but very faint details (e.g. outer spiral arms), and a large amount of background. The trick is to boost the contrast of the interesting details while decreasing the contrast of brightness ranges which are of lesser interest or contain little detail. In addition, you wish to avoid ”burning out” the very brightest details while doing this. MaxIm DL’s high bit depth capability makes this easier to do.
Using the Curves Tool
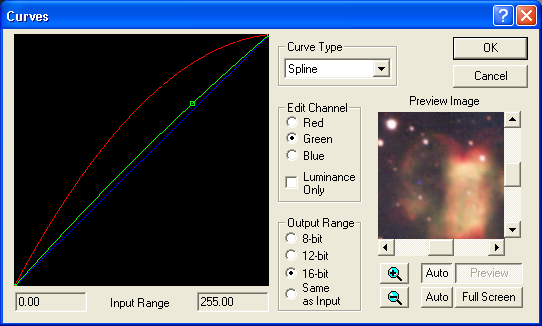
Start out by adjusting the Screen Stretch so that the very brightest areas of the image are not saturated, and the darkest areas are not clipped off. When you run the Process menu Curves command, your screen stretch values will appear as the Input Range. Turn on the Auto Full Screen preview so you can see the effect of the changes as you make them.
Now increase the slope of the line where you want more contrast, and decrease it where you need less contrast. Usually you need to increase the slope at the low end (left side) to bring up the faint details. To avoid ”blowing out” the brightest details, make sure the line never goes completely flat at the top. It is best to work incrementally, running the command several times in succession, tweaking the image a bit at each step. In the example image, the tight ”false nucleus” of the comet is still apparent, even though the dust jets have been boosted up to make them visible. In a subsequent iteration, the faint outer tail would be boosted to help distinguish it from the background.
Some artistic sense is in order. Try not to excessively boost the contrast, burn out the bright regions, or over-exaggerate the faint details. If you have a heavy hand the result will be a gaudy, unnatural looking image. The trick is to make all of the image features visible, while maintaining a light touch so the image looks natural.