Getting Started
Before you begin:
1.Install the required software as described in Requirements.
2.If you installed FocusMax into a directory other than the default C:\Program Files (x86)\FocusMax V4\ :
 Open ASCOM Profile Explorer which is installed with the ASCOM Platform
Navigate to Focuser Drivers/FocusMax.Focuser
Edit registry entry 'FocusMaxInstallPath' to the new install directory
Copy the FocusMax V4 license (fmx.license) that you received from CCDWare into the new install directory
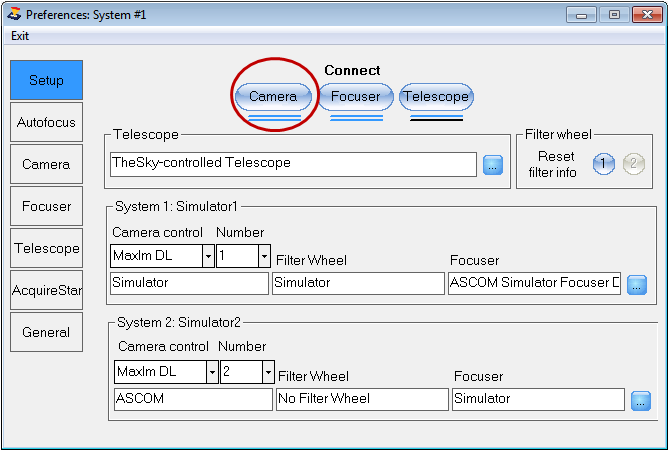
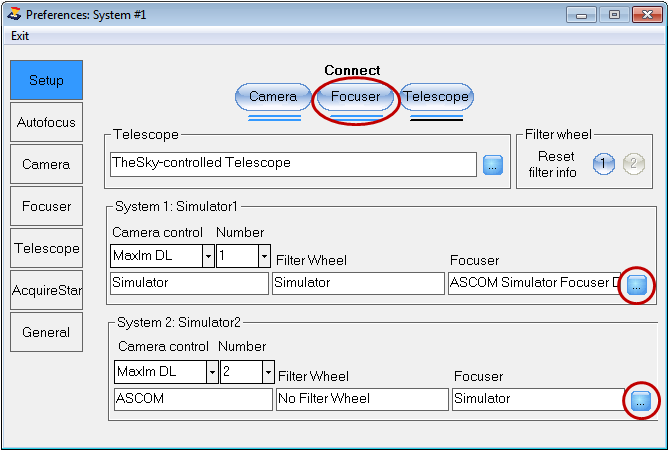
3.Press Menu/Open/Preferences to assign your hardware to System #1 and System #2 (if you have 2 cameras and focuser's). The hardware in each 'System' will used used during the autofocus run. You may quickly toggle between each 'System' by pressing the large 'System' button on the main FocusMax window.
 For each 'System' in the System boxes below, select your camera control software and set your camera assignment to 1 or 2.
Pressing the Connect Camera button will connect to your hardware, query the imaging software and display the camera and filter wheel names.
If the connection is successful then you will see a blue line under the Camera Connect Button.
The selections made should match your actual camera configuration.
|
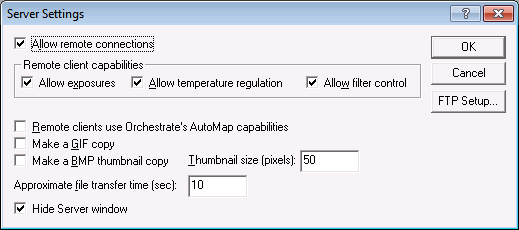
If you are using CCDSoft then the server settings must be setup::
CCDSoft/Menu/Camera/Server Settings and enable the following:
Allow remote connections
Allow exposures
Allow temp regulation
Allow filter control
Hide server window
Uncheck all other settings in particular make a GIF and BMP copy
|
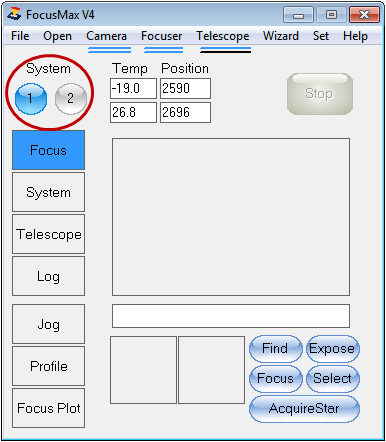
Select the Focus Tab and press the Expose button to verify that the camera will initiate an exposure – if not, then verify that your camera is connected and you have selected your camera correctly in Preferences.
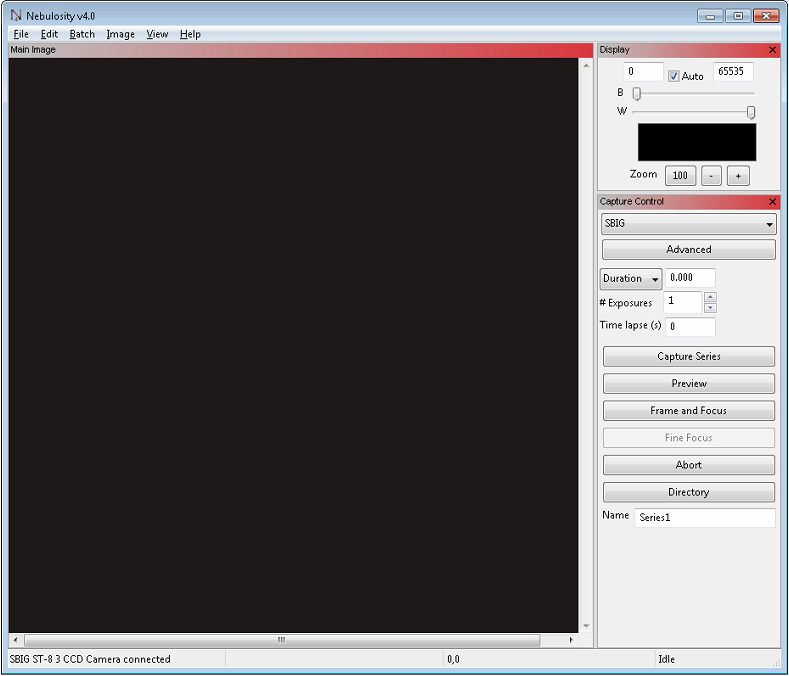
If you are using Nebulosity4
 Download and install the Nebulosity 'ASCOM Camera Driver' http://www.stark-labs.com/downloads.html . This will allow FocsuMax to communicate with Nebulosity 4 via an ASCOM interface.
Select your camera
|
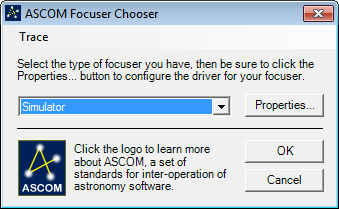
Press small button to the right of the Focuser box
Select your ASCOM focuser
Press Properties to set the focuser driver com port and other driver settings
Press Menu / Focuser/ Connect to establish a connection to the focuser. If the connection is successful then you will see a blue line under the Focuser Connect Button.
|
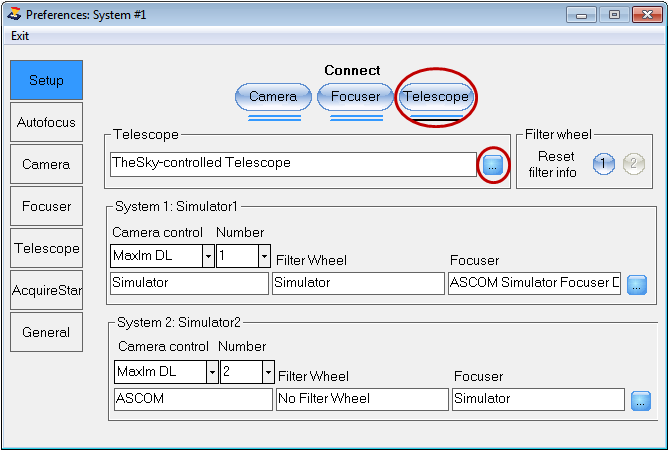
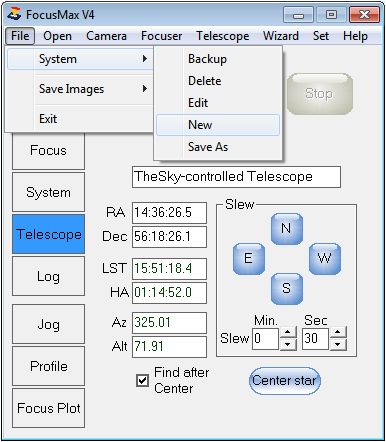
Press the small colored button to the right of the telescope box
 Select your ASCOM telescope driver
Press Properties to set the focuser driver com port and other driver settings
Press Connect Telescope button - a blue line under the Telescope Connect Button that will indicate that the telescope is connected. A black line will indicate that the telescope is tracking
|
|
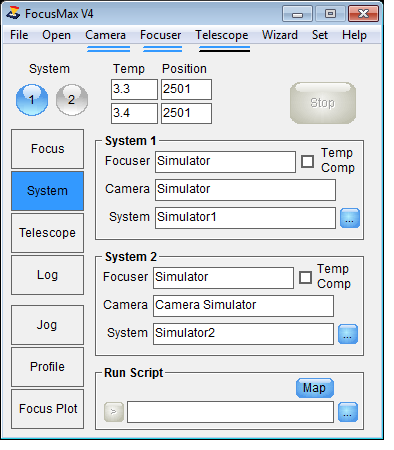
Default System ini Files will be created in the user profile directory (C:\Users\XXX\Documents\FocusMax V4):
MySystem 1 & 2 – default names which can later be changed to describe your system.
Simulator 1 & 2 – when selected, these system names will permit off line testing and learning of the FocusMax software features.
To open a System file and and associate with a System number (1 or 2):
press the flat 'System' command button on the left
press the small colored button to the right in the System box
select the new system
In addition, on startup, FocusMax will create several default directories in the user profile directory (Documents or My Documents, depending on the operating system).
\LogFiles, for Log Files
\Images, for any images that may be saved during Vcurve measurement or autofocus runs
\DataFiles for Vcurve runs and Temperature Compensation runs
\Scripts for custom scripts
Note:
The default system name is ‘MySystem 1 or 2’ are found on the System Tab.
It is suggested that you create a system name that is unique for your setup.
To create a unique system name:
Select Menu/File/System/Save As
Save the file under a unique name.
|
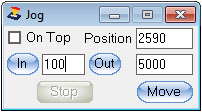
Displays the focuser current position
Allows you to move the focuser in or out X number steps
Allows you to set a position for the focuser to move to
|
Verify that your focuser will move through the entire range of motion according to the focuser specifications.
Enter 0 and press the Move To button
Enter the Max travel position and press the Move To button
If driver adjustments are required, press Menu / Preferences and press the small button to the right of the selected focuser to access the ASCOM focuser driver settings.
1.Specified the camera control software for each camera number and established a connection to your camera(s)
2.Selected and established a connection to your focuser(s)
3.Selected and established a connection to your telescope
4.Have created a unique name for your current system which FocusMax will use to save your settings.
5.Have learned to manually Jog your focuser